During the initial installation of the Q++Studio Workstation your PC is parametrized to allow Q++Studio to use any of the versions of InDesign currently installed on your PC and supported by Q++Studio.
➢If InDesign is already working properly with Q++Studio, and you have only installed an minor update to InDesign (eg. from 2024.0 to 2024.1), then you do not need to follow the steps below, and you only need to respond to the internal and external versions of InDesign are not synchronized message by using the update internal InDesign function.
Below are the steps to follow if you install a new major version of InDesign (eg. installing InDesign 2024 for the first time), after Q++Studio has been installed on your PC, or if you have just installed Q++Studio on a PC for the first time.
1. Install the new version of InDesign normally. 2. At the bottom-left of the main window, click on the InDesign section of the status bar and select locate installed InDesign, as shown on the right. |
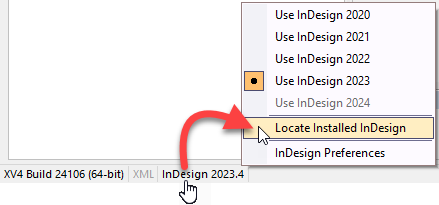 |
3. In the dialog that comes up, click on the Search button. 4. After a minute or two, the dialog will show the versions of InDesign found on your PC. 5. We suggest that you leave all the checkboxes checked and click on the OK button. |
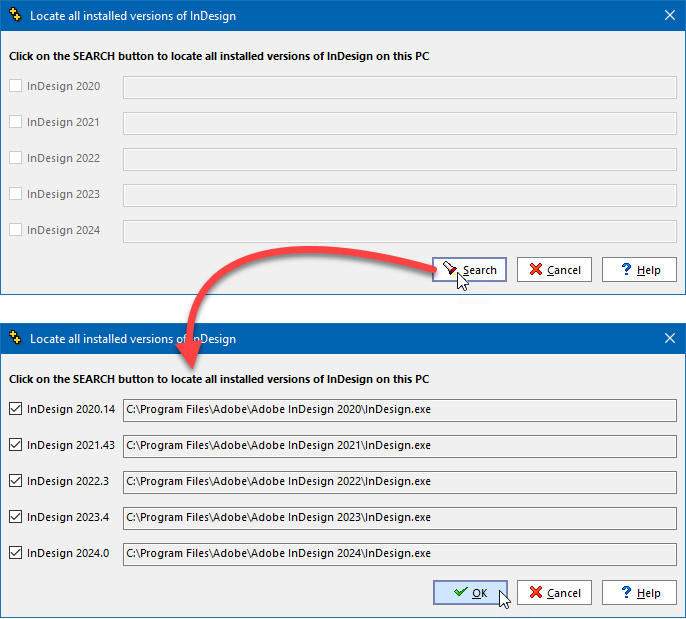 |
6. The last step is to specify which of the installed versions of InDesign you want to use, by once again clicking on the InDesign section of the status bar and selecting the version you wish to use. |
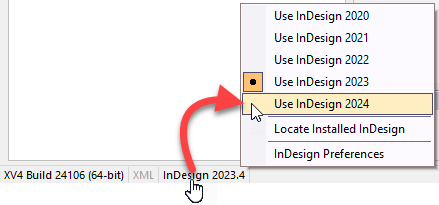 |
As mentioned above, if you have just installed an minor update to InDesign (eg. from 2024.0 to 2024.1), then you simply need to respond to the internal and external versions of InDesign are not synchronized message by using the update internal InDesign function.
See also: installing a new version of QuarkXPress.
Topic 183210, last updated on 18-Oct-2023