
the individual slogan editor
Slogans are listed at the top-right of the slogans manager and edited at the bottom-right of the same, as shown on the right.
There are 3 parts to each slogan; sequence, text and graphic (if any).
Editing a Slogan's Sequence: depending on the type of slogan set, the left part of the Slogan Editor appears differently:
•In the case of "cyclical" slogan sets, the sequence is a simple number, modified with a spin edit control.
•In the case of "month-day" slogan sets, the sequence is edited using a combo box for the month and a spin edit for the day.
•In the case of a "specific date" slogan set, the sequence is edited by selecting a date from a calendar control.

the slogan editor popup menu
Note that the sequence of each Slogan within a Slogan Set is unique.
To modify the text in a Slogan, simply type into the slogan editor, shown above.
•Any underscore character "_" (without the quotes) contained in this string will be replaced by a non-breaking space (unless it is used in the [_ and _] pairs to indicate the presence of a real opening or closing brace).
•Use the slogan editor pop-up menu to apply formatting to all or parts of the currently-selected slogan (see next section for more details).
•You can use carriage returns; these will be transformed into "soft-returns". Alternatively you can use the hard and soft returns special character markers to make your choice of soft or hard return unambiguous.
All characters are allowed, including ones such as CJK, Arabic and Hebrew.

➢In the slogans manager, the bold and italics formatting is generic, which corresponds to electronic bold and electronic italics (as opposed to the use of a specific font for bold and a specific font for italics). You can specify that the generic bold and italics formatting of each slogan should be replaced by the fonts as specified in the slogan rules property editor.

If you apply more than one formatting to some text, make sure that all formatting is fully withing other formatting. That is to say, any closing tag, such as </b> should always correspond to the most recently opened tag, in this case <b>.
Replacing electronic bold and italics
In the slogans manager, the bold and italics formatting is generic, which corresponds to electronic bold and electronic italics (as opposed to the use of a specific font for bold and a specific font for italics).
But, nowadays, the use of electronic bold and/or electronic italics is either discouraged (QuarkXPress 2018-2026) or simply not available (InDesign).
For such cases, you can specify that the generic bold and italics formatting of the names of recurring holidays from each slogans set of the current scriptline should be replaced by the fonts as specified in the slogan rules property editor.
Note that, though the replacement of generic bold and italics is not necessary for QuarkXPress 8-2017, you can still use it if you wish to have better control over the bold and italics parts of your slogans.
You can choose to have a graphic displayed instead of text for each slogan (which can be any supported image file type, as well as a PDF, an AI, or an INDD document), using slogan image tokens and selecting any type of graphic file accepted as a valid picture box file by QuarkXPress or InDesign.

Note that you can set all or some of the graphics settings, described below, at once for all the slogans of the current slogans set, by using the graphics options batch tool.
You can also override the graphics options specified here, in the slogans rules scriptline property's override graphics options setting.
Options For All File Formats
You can use the Transparent option to specify that the inserted picture is transparent (for PDF, AI, black & white, and vector images) when using QuarkXPress 2015-2026 or InDesign 2020-2026.
The Fit box to picture option specifies that the picturebox height or width should be reduced if it is taller or wider than the enclosed image as currently displayed. What is meant by "as currently displayed" is that the X/Y scale of the picture will not be changed by the use of the Fit box to picture option. This setting requires QuarkXPress 2016-2026 or InDesign 2020-2026.
PDF and AI documents

PDF Box options in QuarkXPress and InDesign
The PDF box to use option allows you to specify the PDF box options to use.
As shown in the image on the right, these correspond to:
•The bounding box values in the import dialog used to import PDF documents into QuarkXPress.
•Or to the crop to setting of the place command of InDesign.
This setting only applies to PDF images, and requires QuarkXPress 2016-2026 or InDesign).
INDD documents
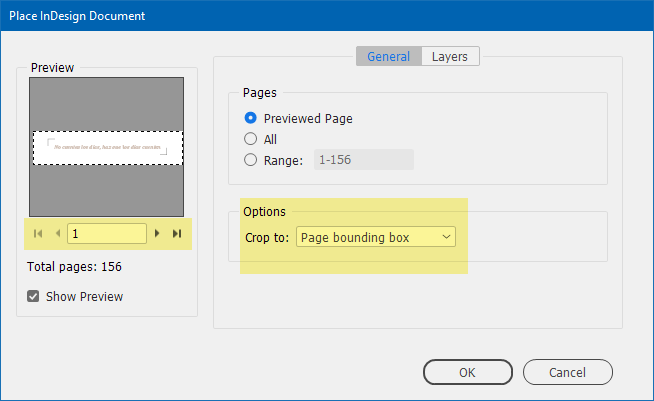
➢This option is only available when using InDesign.
The screenshot on the right shows the corresponding settings dialog in the InDesign user interface.
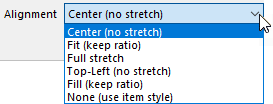
See also: picture box alignment options.
Topic 105030, last updated on 11-May-2026