This topic presents an overview of the differences between the QuarkXPress and InDesign attributes and features available to use in Q++Studio.
Specific details, and case-by-case workarounds, when available, can be found in the native formatting topics for text attributes and paragraph attributes.
Not available in both QuarkXPress and InDesign
 or are not supported by QuarkXPress (purple) or are implemented differently (green)")
attributes which are not supported by InDesign (red) or are not supported by QuarkXPress (purple) or are implemented differently (green)
Some text face attributes used in QuarkXPress are not available in InDesign, and vice-versa, as shown using the various highlight colors, in the image on the right.
Only Available in QuarkXPress
Electronic (also known as faux) bold and italic is only available when using QuarkXPress and means clicking on bold/italic and letting QuarkXPress automatically substitute the appropriate font (if it can find it).
The way to apply bold and/or italics to text, when using QuarkXPress 2018-2026 or any version of InDesign, is discussed in the section below.
Applying shadow (or drop shadow) to text is not available when using InDesign.
The outline face attribute is not available, when using InDesign, but it can be replaced advantageously by text stroking.
➢Wherever the outline settings appears in the Q++Studio interface, you will also find a stroke setting, as is the case in the example on the right (note that text stroking is also available when using QuarkXPress 2017-2026).
Opacity is an object attribute in InDesign, meaning that it can only be applied to object, such as textboxes and line objects. It is not possible to specify the opacity of text or strokes in InDesign.
Only Available in InDesign
Some text face attributes used in InDesign are not available in QuarkXPress, as shown using purple highlight, in the image on the right.
Text skew is only available in InDesign.
➢Using a skew value of 12° will provide a good approximation of QuarkXPress' electronic italics.
Character-based leading is only available in InDesign (see section below for more details).
Additionally, InDesign allows for the setting of character-based overprint, while QuarkXPress in many cases only allows the color black to overprint, at a global level, not on a per-character basis.
Differences in Implementation
Some attributes exist in both QuarkXPress and InDesign but are implemented differently.

evolution of bold and italics in the QuarkXPress user interface over the years
The way to apply bold and/or italics to text, when using QuarkXPress 2018-2026 or any version of InDesign, is to select the corresponding font name and style, as shown in screenshots 3 and 4 on the right.
➢In the case of italics, as a workaround for a font that does not have an italic version (or in cases when you do not know the font to why you want to apply italics), using a skew value of 12° generally produces a result similar to the QuarkXPress use of electronic italics.
➢In the case of bold, as a workaround for a font that does not have an bold version (or in cases when you do not know the font to why you want to apply bold), using a stroke value of 0.15 generally produces a result similar to the QuarkXPress use of electronic bold.
Although the use of electronic bold and italics is still available when using QuarkXPress, it has been discouraged by Quark since QuarkXPress 2018, with the user interface of more recent versions of QuarkXPress preventing easy access to these options, as can be seen in the screenshots 1-2-3, above, taken from the user interface of QuarkXPress versions 2017, 2018, and 2024.
The formatting of text underline in QuarkXPress is based on the text style sheet currently in use.
But, InDesign text underline can also be specified for each character, independently of any character style. That is to say, just like you can override the font size of a particular character, as compared to its character style font size value, you can also override the underline options of some text, as compared to its character style settings.
We generally always recommend that you set text underline options as part of a text style; this will make it much easier to apply changes to these underline options, if the need ever arises. An advantage of using styles to set your underline options, as discussed below, is that the wealth of underline options lets you easily reproduce the effect of QuarkXPress text shading.
The formatting of text strike-through in QuarkXPress is based on the text style sheet currently in use.
InDesign text strike-through can also be specified for each character, independently of any character style. That is to say, just like you can override the font size of a particular character, as compared to its character style font size value, you can also override the strike-through options of some text, as compared to its character style settings.
We generally always recommend that you set text strike-through options as part of a text style; this will make it much easier to apply changes to these strike-through options, if the need ever arises.

specifying kerning in QuarkXPress
Kerning in QuarkXPress uses either the value 0, meaning that the font designer's built-in kerning pairs should be used (metrics kerning), or an override value differing from 0.
Note that the same user interface control is used to specify both kerning and tracking in QuarkXPress.
➢To specify kerning in QuarkXPress, place your cursor between 2 characters, without selecting any character as shown in the image on the right.
The InDesign user interface has individual controls to specify kerning and tracking separately.
Metrics and override kerning is also available in InDesign but, when using override kerning values, you should use a value about 5 times larger in InDesign as in QuarkXPress (that is to say, to get the same effect as a kerning of -20 in QuarkXPress, you should use a kerning of -100 in InDesign).
In addition to metrics and override kerning, InDesign also features optical kerning which kerns based of the appearance of each character, and works even between characters of different font sizes and/or different fonts.
specifying tracking in QuarkXPress
As mentioned above, the same user interface control is used to specify both kerning and tracking in QuarkXPress.
➢To specify tracking in QuarkXPress, select one or more characters as shown in the image on the right.
The InDesign user interface has individual controls to specify kerning and tracking separately.
In a manner similar to kerning, when using override tracking values, you should use a value about 5 times larger in InDesign as in QuarkXPress (that is to say, to get the same effect as a tracking of -20 in QuarkXPress, you should use a tracking of -100 in InDesign).
In QuarkXPress, the allowed values for baseline shift are based on the font size of the text to which the baseline shift is applied, namely from -3x to +3x (for example, text in size 9pts will not be able to be baseline shifted by any value outside of the -27 to +27 range). If you try to set a baseline shift value outside of this range, using the text attributes editor or a macro resulting action or a sara, then message 187080 will be issued and the instruction will be ignored.
The allowed range of baseline shift values in InDesign is -5000 to +5000 and is independent of the font size.
In QuarkXPress, leading is a paragraph attribute. But, in InDesign, by default, leading is a character attribute.
➢As per the Adobe documentation, "By default, leading is a character attribute, which means that you can apply more than one leading value within the same paragraph. The largest leading value in a line of type determines the leading for that line.").
This means that in InDesign you can apply more than one leading value within the same paragraph. You can select a preferences option so that leading applies to the entire paragraph, instead of to text within a paragraph. This setting is generally more confusing than helpful as, once set, it only applies to newly created frames, and does not affect the leading in existing frames.
Text background shading and framing of text
Text background shading and framing exist in both QuarkXPress and InDesign, but in QuarkXPress text shading and text framing are text attributes, while shading and borders are paragraph attributes in InDesign, and are not directly available in Q++Studio.
Nonetheless, when using InDesign with Q++Studio, it is possible to use macros or saras to apply styles which feature shading and/or borders.
In the case of shading, it is possible to use the underline attribute of a text style to reproduce the effect of QuarkXPress text shading, which mean that various parts of the same line/paragraph can be set to different text background shading (see this topic for an example).
In the case of text framing, when using InDesign with Q++Studio, it is possible to use macros or saras to apply paragraph styles which feature borders but, being a paragraph style, it will apply to the entire paragraph, meaning that it is impossible to apply framing at the character or word level.
Text stroking
There are minor differences in the implementation of text stroking in QuarkXPress and InDesign.

➢Converting a QuarkXPress script to InDesign will often lead to warnings such as message 185255, which can be fixed by replacing the Indents option with Columns.
The thickness of the rules above or below is called width in QuarkXPress and weight in InDesign.
Increasing the thickness of a textbox's frame has a different effect in QuarkXPress and InDesign.
In QuarkXPress, the frame thickness grows inward, meaning that increasing the thickness of a box frame will not change the overall size of that box.
However, in InDesign, the frame thickness grows both inward and outward, meaning that increasing the thickness of a box frame by 1 point, for example, will increase the frame thickness by 0.5 point inward and 0.5 point outward, thus making the box 1 point taller and 1 point wider.
Anchored Boxes
In InDesign, it is possible to nest anchored boxes (a box anchored in another anchored box). This can be very useful to have anchored minicalendars with week shading within each minicalendar as shown here.
XPress Tags
XPress tags, as their name indicates, are native to QuarkXPress.
There is a third-party solution from em-software, Xtags for InDesign, which allows for the manual use of XPress tags in InDesign. But, currently (July 2026), there are no plans for Q++Studio to include the automated processing of XPress tags in InDesign, using Xtags for InDesign.
Instead, as the main use of XPress tags is for 5 week minicalendars, for InDesign there is a new native formatting of 5-week minicalendars option which reproduces almost all the options previously used with XPress tags, in a much more user-friendly manner (and which also works with QuarkXPress).
Arabic support
Q++Studio comes with its own set of Xtensions to provide all the required features of Arabic (ligatures, flipping, kashidas, ...). This works extremely well for tokens and single-line text at run-time (during diary generation) but is cumbersome at design-time (when working in QuarkXPress manually), in particular for multiline text.
➢Quark introduced partial support for Arabic in QuarkXPress 2023 (without kashidas as of July 2026).
InDesign can be installed with native support for Arabic and this works as well as the QuarkXPress solution at run-time, but works immensely better at design-time, in particular for multiline text.
Below are some tips on making InDesign generate diaries as quickly as possible.
Template Design
The following aspects of a template have been found to slow down diary generation a lot when using InDesign:
•Rotated text boxes and/or rotated text.
•Linked text boxes, in particular at the end of the diary (page number 100 and above).
The above should be avoided as much as possible.
As explained in more detail here, it is usually good practice for your InDesign GridTemplate's master pages to contain the page margins, as well as any fixed element of your template (lines, images, tables without tokens, textboxes without tokens, ...). This is particularly true for templates that are copied tens if not hundreds of time, such as main grids.
Placing all the non-modifiable elements of your main grid templates on master pages as described here, will speed-up the page-copying stage of diary generation and also create much smaller output files.
Generation Options for Optimal Speed
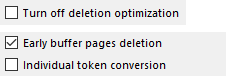
Note that the turn off deletion optimization also applies to QuarkXPress versions 2016-2026.
Additional Optimizations
When using InDesign, the page copying step of diary generation can sometimes get very long when generating diaries with over 150 pages and/or complex page structures (such as linked boxes and/or rotated textboxes).

•For daily or weekly diary scripts containing over 150 pages, set the option to a value around 25, as shown on the image on the right.
•For monthly or yearly calendar scripts, which may contain only only 10-20 pages, but which include multiple layers and objects, try to set the option to a value between 3 and 5.


Topic 185280, last updated on 30-Jun-2026